
Native Executable Patching
I was continuously asked how to apply security patches which were being released, instead of including instructions in each patch that I released I decided to put together a quick general guide. While this guide primarily focuses on Knight Online private server files, it serves as a good example and all terminology and methods will apply.
To begin, we’ll start with the screen you’ll be prompted with just after you open ebenezer in OllyDbg. I’m using Ollydbg because it’s easier, don’t use a hex editor it’s just silly. Olly will translate opcodes to hex for me and will make far less mistakes! Also note, I’m using the classic version (v1.10 final) - the v2 alpha is becoming increasingly popular and sports some exciting new features and some amazing improvements. So be sure to check it out! (Note: The original images were lost and the updated ones now reflect OllyDBG 2.01).

On the right, you have the first screen you’ll be confronted with after loading your executable. Briefly, starting from the top left you have your ‘CPU’, this is the main window you’ll be using which consists of a disassembly of the image from memory at the specified location, this is what translates your ‘hex’ into assembly and visa versa. To the right hand side you have your registers, you may think of these like your typical variables but remember they’re pointers, either way these represent the values your assembly code is using.
Just like in most native languages you need to de-reference a pointer before you use the value, this is why you may see DWORD PTR DS:[pointer], which means there’s 4 bytes at this location that we want, and we want an unsigned value of it. For all you fellow readers from a linux background, a DWORD is typedef’d in the winapi as an unsigned integer.
On the bottom left we have the dump, this is usually where I’d follow the values of registers but it’s multi-purpose and is also very handy for viewing a region of memory, think of this as your traditional hex editor. Finally, to the right of the dump is the stack, I wont fully explain it here since it’s not necessary for this patch, generally you can use it for following parameters passed to a function and it’s tempory storage. Every thread has its own stack. Now, moving onto the actual patch. Let’s navigate to the area we want to patch, on the far left of the CPU you have the address you’re currently viewing. The currently executing line of code is at eip (Instruction pointer, a register).
We want to goto 0x00498B59 (The 0x represents hex, like &H in basic). To do this we press CTRL+G or can navigate by the menu, a window like this will appear:
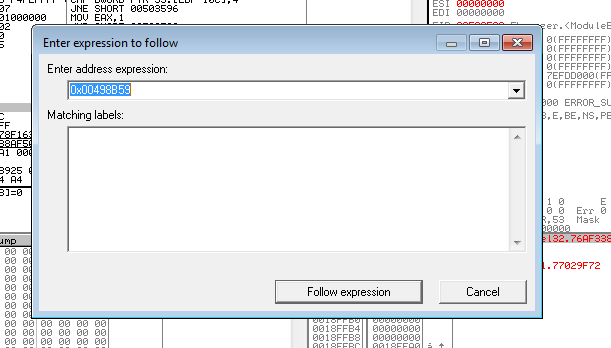
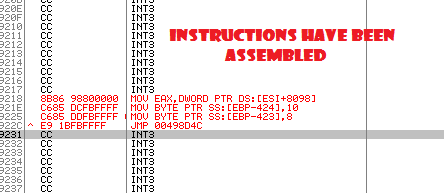
Press enter (or “Follow Expression”), and it’ll take us to the code we want to modify. As you can see, it’s exactly how osmanx said it would be. Now lets make the appropriate adjustments. You can see here that it’s comparing the 8bit BL register to 0x11 (Rememer everything is in hex). If it’s equal, it goes to the same location as if it’s 0x07, This looks like it was meant to be expanded at some point. They’re both going to the same location regardless, so we want to change 0x11 to goto our codecave.
To do this, double click the line we want to modify which is 0x00498B5C and modify it to the code displayed. JE 00499218
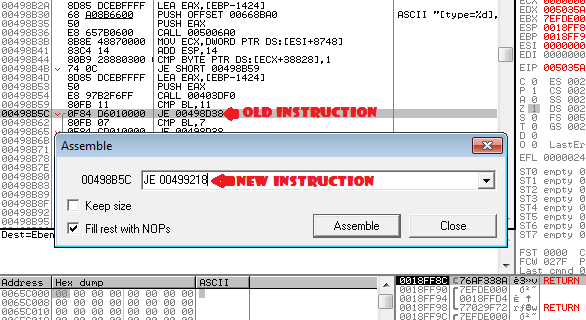
Press “Assemble”, if all goes well and you typed it correctly it’ll modify the hex appropriately for you.
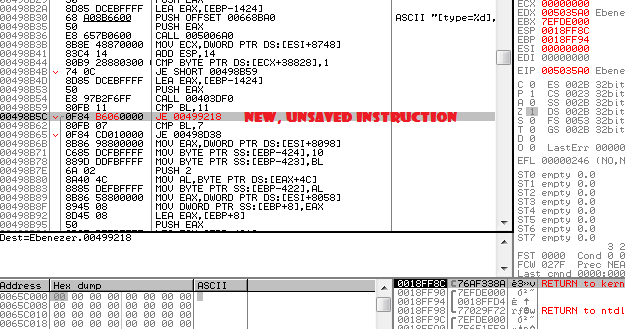
Now, tap enter to follow that jump to our code cave, or use CTRL+G -> 00499218 if you want to do it manually.
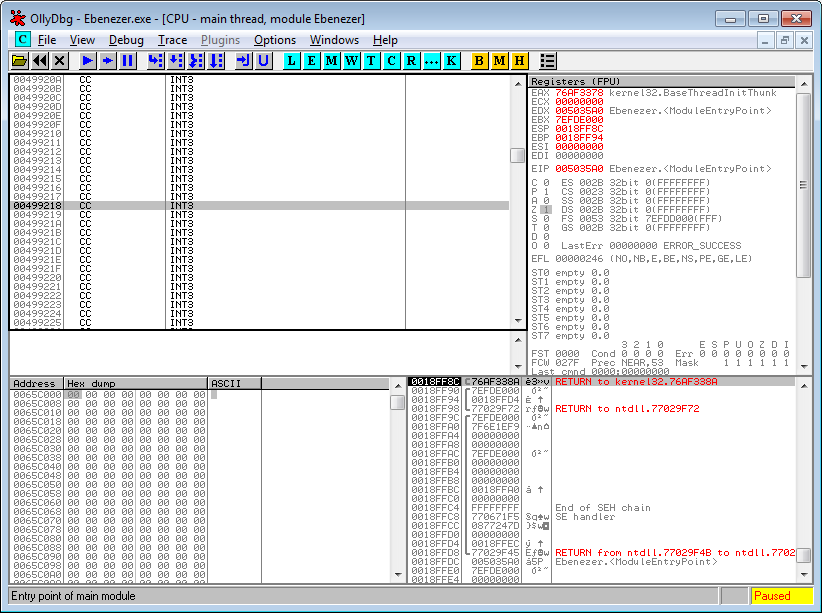
This will take you to our code cave which is just a block of INT3’s, this instruction is used to trigger a breakpoint but is also often padded between functions. It’s an ideal location for us to make our patch since it isn’t executed!
Assemble, just like you did before our block of code.
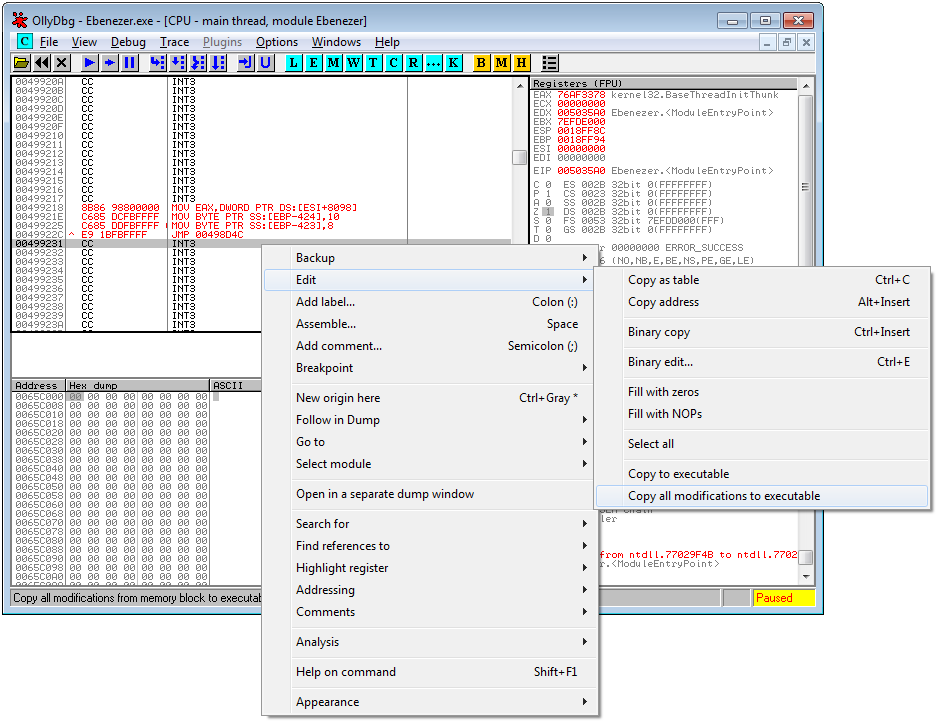
Next, right click in the main CPU window, navigate to “copy to executable” and select “copy all modifications” as shown in the following image.
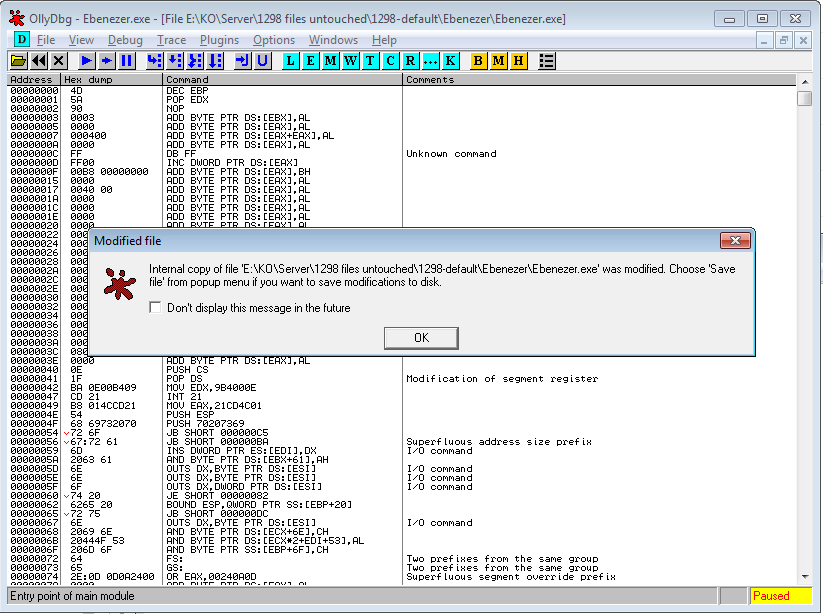
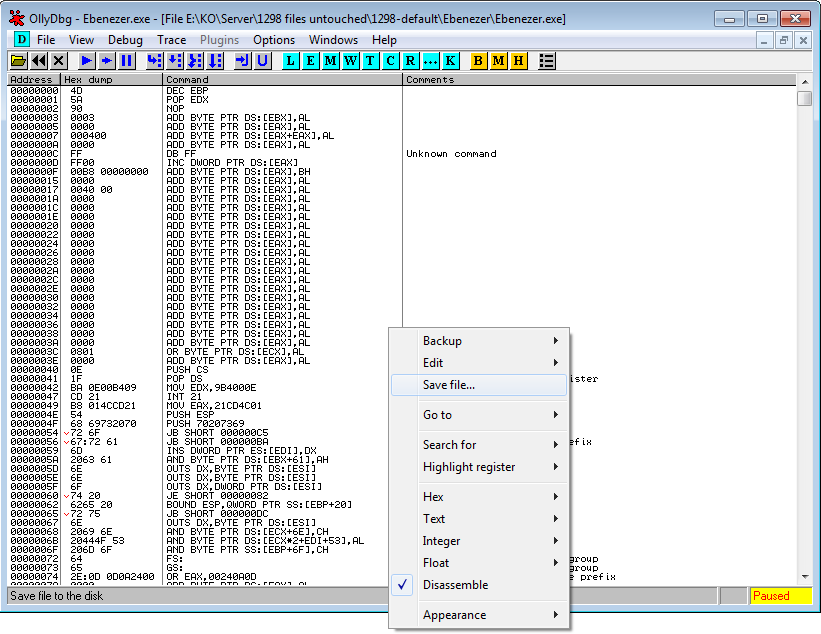
Then it’ll copy the memory image to a new window and allow you to save it to disk with the modifications, you can do that once again by following the navigation to “Save File” as shown to the right
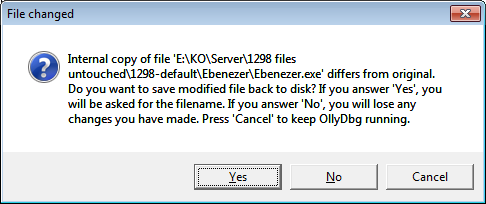
OllyDBG 2.0 will give an additional confirmation menu
Then a little window will appear asking you where to save it. I’d suggest you make a backup EVERY time, incase you make a mistake or the patch is incorrect (though i’m sure it isn’t!).

That concludes this article. I hope I didn’t miss anything important out. If you have any questions feel free to e-mail me for further clarification!